


Plique-à-jour (French for "letting in daylight") is a vitreous enamelling technique where the enamel is applied in cells, similar to cloisonné, but with no backing in the final product, so light can shine through the transparent or translucent enamel. It is in effect a miniature version of stained-glass and is considered very challenging technically: high time consumption (up to 4 months per item), with a high failure rate. The technique is similar to that of cloisonné, but using a temporary backing that after firing is dissolved by acid or rubbed away. A different technique relies solely on surface tension, for smaller areas. In Japan the technique is known as shotai-jippo (shotai shippo), and is found from the 19th century on.
History
The technique was developed in the Byzantine Empire in 6th century AD. Some examples of Byzantine plique-à-jour survived in Georgian icons. The technique of plique-à-jour was adopted by Kievan Rus' (a strong trading partner of Constantinople) with other enamel techniques. Despite its complexity plique-à-jour tableware (especially "kovsh" bowls) was used by its aristocracy. Russian masters significantly developed plique-à-jour technique: in addition to cells cut in precious metal they worked with cells made of silver wire. Unfortunately the plique-à-jour technique of Kievan Rus' was lost after the crushing Mongol invasion in the 13th century. Some surviving examples are exhibited in the Historical Museum in Moscow.
Western Europe adopted the plique-à-jour technique (cells cut in metal) of Byzantium. The term smalta clara ("clear enamel"), probably meaning plique-à-jour appears in 1295 in the inventory of Pope Boniface VIII and the French term itself appears in inventories from the 14th century onwards. Benvenuto Cellini (1500–1571) gives a full description of the process in his Treatises of Benvenuto Cellini on Gold-smithing and Sculpture of 1568. Pre-19th century pieces are extremely rare because of their "extreme fragility ... which increases greatly with their size", and the difficulty of the technique. Survivals "are almost exclusively small ornamental pieces". The outstanding early examples that survive are "the decorative insets in the early fifteenth-century Mérode Cup (Burgundian cup) at the Victoria and Albert Museum in London, a Swiss early sixteenth-century plique-à-jour enamel plaque representing the family of the Virgin Mary in the Metropolitan Museum of Art in New York, and the eight pinnacle points over the front of the eleventh-century Saint Stephen's Crown in Hungary". The technique was lost in both Western and Eastern Europe.
The technique was revived in the late 19th century movement of revivalist jewellery, and became especially popular in Russia and Scandinavia. Works by Pavel Ovchinikov, Ivan Khlebnikov, and some masters working for Faberge are real masterpieces of plique-à-jour. Russian masters predominately worked with tableware. Norwegian jewellers included David Andersen and J. Tostrup in Oslo, and Martin Hummer in Bergen. Art Nouveau artists such as René Lalique, Lucien Gaillard and other French and German artists predominantly used plique-à-jour in small jewellery, though the Victoria & Albert Museum has a tray of 1901 by Eugène Feuillâtre (1870–1916).
Currently plique-à-jour is not often used, because it is challenging technically and mainly because of breaks in transferring skills from one generation of jewellers to the next. However, some luxury houses do produce limited numbers of products in the plique-à-jour technique, for example Tiffany in jewellery, and Bulushoff in jewellery and tableware. Works in the shotai shippo technique are also known from China and Iran.
Techniques
| This section does not cite any sources. Please help improve this section by adding citations to reliable sources. Unsourced material may be challenged and removed. (March 2021) (Learn how and when to remove this message) |
There are four basic ways of creating plique-à-jour:
1. Filigree plique-à-jour ("Russian plique-à-jour"): This is a building up process whereby a planned design is interpreted using gold or silver wires which are worked over a metal form (e.g. a bowl). Wires are twisted or engraved, i.e. have additional micro patterns. The wires are soldered together. Enamels are ground and applied to each "cell" created by the metal wirework. The piece is fired in a kiln. This process of placing and firing the enamels is repeated until all cells are completely filled. Usually it takes up to 15–20 repeats.
2. Pierced plique-à-jour ("Western plique-à-jour"): A sheet of gold or silver is pierced and sawed, cutting out a desired design. This leaves empty spaces or "cells" to fill with enamel powders (ground glass).
3. Shotai shippo ("Japanese plique-à-jour"): A layer of flux (clear enamel) is fired over a copper form. Wires are fired onto the flux (similar to cloisonné) and the resulting areas are enameled in the colors of choice. When all the enameling is finished, the copper base is etched away leaving a translucent shell of plique-à-jour.
4. Cloisonné on mica: Cells in precious metal are covered with fixed mica, which is removed by abrasives after enameling.
Process for cloisonné plique-à-jour on mica
Sample process
-
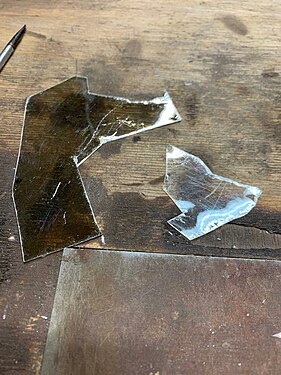 1. Mica is used to stop the enamel powder from flowing out when it is heated up. It can resist high temperature and enamel won't stick to it.
-
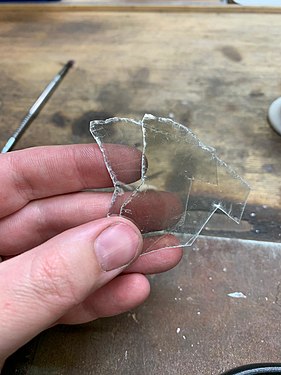 2. Blocks of mica are made of thin sheets. Select one larger than the piece that will receive the enamel.
-
 3. The shape of the object to receive the cloisonné enamel is cut out from the mica sheet.
-
 4. A sheet of copper is also cut out. It needs to be large enough to be folded on the sides of the piece.
-
 5. The piece and the mica sheet are carefully wrapped in the copper foil. It is important that the copper folds do not touch the parts that will be enamelled
-
 6. Enamel powder comes in different colors.
-
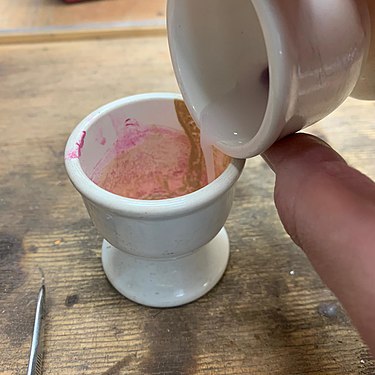 7. The enamel powder first needs to be washed.
-
 8. The cleaner the color, the clearer the enamel.
-
 9. The enamel powder is applied wet. Capillary action helps filling the shapes and reduces the space between the grains of color. This prevents bubbles from forming as the piece is fired.
-
 10. The enamel must be applied layer by layer since it collapses during firing. At the same time, care should be taken that the grains do not spread over the edge.
-
 11. The enamel powder is left to dry completely. If the powder is still humid, the enamel will form bubbles. These will burst and spread liquid enamel on the piece and inside the oven.
-
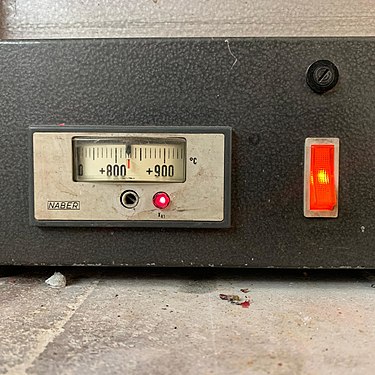 12. Meanwhile, the oven is preheated (in this case to 825 °C).
-
 13. After the oven has been preheated at the desired temperature and the enamel powder has completely dried, the pieces can be placed inside.
-
 14. As soon as the enamel is melted, the firing is done. Since this is a fairly quick process (around a minute or less at this temperature), the firing is monitored through a peephole to make sure the enamel is not overheated.
-
 15. The pieces need to cool down slowly.
-
 16. Once the piece has cooled down, new enamel powder can be applied a second time if necessary.
-
 17. The copper foil and the mica are then removed.
-
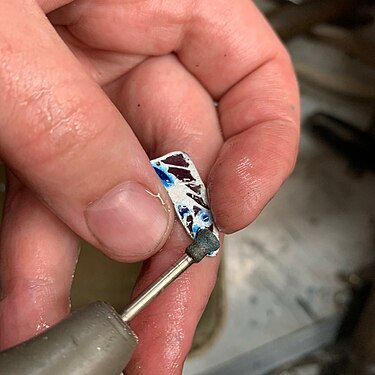 18. Excess enamel is removed with an aluminum-oxide-abrasive mounted wheel.
-
 19. It is dangerous to breathe the dust produced by the use of the drill. The pieces are kept wet to prevent dust from flying into the air.
-
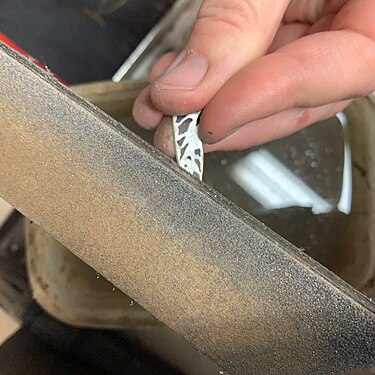 20. The surface of the piece is then levelled and smoothed out with sanding paper.
-
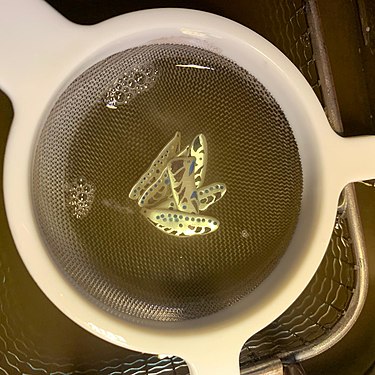 21. The pieces are then cleaned from the sanding dust.
-
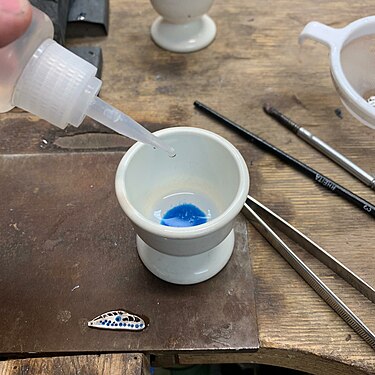 22. Minor flaws can now be fixed. Gum tragacanth is added to the wet powder to keep it in place for the last firing.
-
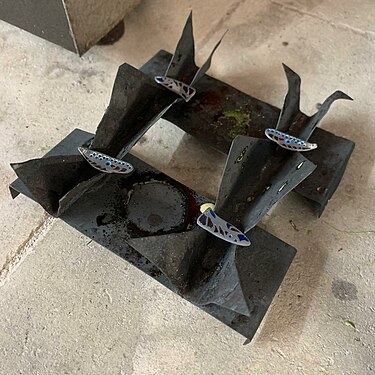 23. The last firing gives shine to the enamel. It is important here that the enamel has no contact with the support.
-
 24. The last firing also makes the enamel more translucent. It is the trickiest step since the enamel will fall out if it liquefies.
-
 25. The creatures are ready for their first flight!
Notes
- Campbell, 38–40; Ostoia, 78; Plique à Jour – Yesterdays Technique Today Archived 11 July 2011 at the Wayback Machine, Bill Helwig, June 1992, Glass on Metal magazine
- The Art of Fine Enameling, Karen L. Cohen, p. 10
- Japanese bowl in the V&A
- Georgian Art Studio Phokani
- Lang Antiques
- Labarte, Histoire des arts industriels, iii, Paris, 1865, p. 441
- Recherches sur la peinture en émail dans l'antiquité et au moyen âge, Jules Labarte, 1856.
- Plaque in Metropolitan
- Ostoia, 78
- Marit Guinness Aschan and Rika Smith McNally. "Enamel." Grove Art Online. Oxford Art Online. 28 July 2010 Subscription required.
- "National Gallery of Art". Archived from the original on 29 May 2010. Retrieved 10 July 2010.
- "Comb in the form of two dragonflies, Lucien Gaillard, c. 1904". Rijksmuseum. Retrieved 20 October 2020.
- Ring-tray by Eugene Feuillâtre, V&A.
References
- Campbell, Marian. An Introduction to Medieval Enamels, 1983, HMSO for V&A Museum, ISBN 0-11-290385-1
- Ostoia, Vera K., "A Late Mediaeval Plique-à-Jour Enamel", The Metropolitan Museum of Art Bulletin, New Series, Vol. 4, No. 3 (Nov. 1945), pp. 78–80, JSTOR
External links
 Media related to Plique-à-jour at Wikimedia Commons